Your Growth Is Our Mission — Let’s Build a Better Future Together

Plumbers Department Manual: Your Guide to a Professional Career
Your Comprehensive Guide to Starting a Plumbing Career
Welcome to the exciting world of plumbing! This manual is your foundational step towards a high-income, in-demand career as a professional plumber. At Goa Community Services, we believe in practical, accessible learning. Alongside this guide, our embedded YouTube video tutorials will provide visual, step-by-step instruction, making your journey from novice to certified plumber seamless.
Module 1: The Foundations of Plumbing - Safety, Tools & Terminology
1.1 Safety First: The Plumber's Non-Negotiable
Before any wrench turns or pipe is cut, safety is paramount. Plumbing involves working with water, gas, electricity, and heavy materials, all of which pose risks.
Personal Protective Equipment (PPE):
Safety Glasses/Goggles: Protect against splashes, debris, and flying particles.
Gloves: Protect hands from chemicals, sharp edges, and hot water.
Work Boots: Steel-toe or reinforced boots protect against falling objects and punctures. Non-slip soles are essential.
Hearing Protection: When using power tools.
Respirator/Mask: When dealing with dust, mold, or hazardous fumes.
Electrical Safety: Always assume electrical components are live. Turn off power at the main breaker before working near water heaters, well pumps, or other electrical appliances. Use a non-contact voltage tester.
Water Shut-Off: Know the location of the main water shut-off valve for any property you work on. Always turn off the water supply before starting work that involves disconnecting pipes.
Gas Safety: Only qualified professionals should work with gas lines. If you suspect a gas leak (smell of rotten eggs), evacuate immediately and contact the gas company.
Ladder Safety: Ensure ladders are stable, on level ground, and rated for your weight plus tools.
Lifting Techniques: Lift with your legs, not your back, to prevent injury.
1.2 Essential Plumbing Tools: Your Workshop Arsenal
A plumber is only as good as their tools. Here's a starter kit, with videos showing proper use:
Wrenches:
Adjustable Wrench (Crescent Wrench): Versatile for various nut and bolt sizes.
Pipe Wrench: Essential for gripping and turning pipes and fittings. Comes in various sizes (e.g., 10-inch, 14-inch).
Basin Wrench: Long shaft, spring-loaded jaws for reaching nuts in tight spaces (e.g., under sinks).
Strap Wrench: For polished pipes or fittings to avoid scratches.
Pliers:
Channel Locks (Tongue-and-Groove Pliers): Adjustable jaws for gripping pipes, nuts, and irregular shapes.
Needle-Nose Pliers: For small parts, bending wires, or reaching confined areas.
Cutting Tools:
Pipe Cutter (Copper/PVC): Provides clean, straight cuts on various pipe materials.
Hacksaw: For general cutting, including metal and plastic pipes.
Tubing Cutter: Specifically for copper tubing.
Measuring & Marking:
Tape Measure: For accurate pipe lengths and fixture placement.
Pencil/Marker: For marking cut lines.
Cleaning & Clearing:
Plunger (Flange & Cup): For clearing minor clogs in toilets and drains.
Drain Snake/Auger (Hand & Power): For clearing deeper, tougher clogs in drains.
Joining & Sealing:
Teflon Tape (PTFE Tape): For sealing threaded pipe connections.
Pipe Dope/Thread Sealant: An alternative or complement to Teflon tape for threaded connections.
Flux & Solder (for Copper): Chemicals for joining copper pipes via soldering.
Torch (Propane/MAPP gas): For heating copper pipes during soldering.
PVC Primer & Cement: For solvent-welding PVC pipes.
Miscellaneous:
Level: Ensuring pipes and fixtures are installed straight.
Screwdriver Set (Phillips & Flathead): For various fasteners.
Flashlight/Headlamp: For illuminating dark work areas.
Bucket/Rags: For catching water and cleaning up spills.
1.3 Plumbing Terminology & Abbreviations
Understanding the language of plumbing is crucial.
Fixture: Any device that uses or drains water (e.g., sink, toilet, shower).
Valve: A device that controls the flow of liquid or gas.
Pipe: A rigid tube (e.g., copper, PVC, PEX, galvanized steel) through which water flows.
Fitting: Connects two or more pipes (e.g., elbow, tee, coupling, union, reducer).
Trap (P-Trap/S-Trap): A curved section of pipe that holds a small amount of water to prevent sewer gases from entering the building.
Vent Pipe: Allows air into the drainage system, preventing a vacuum and ensuring proper drainage.
Drain-Waste-Vent (DWV) System: The system that carries wastewater and maintains proper air pressure in the pipes.
Water Heater: Heats water for domestic use.
Main Shut-off Valve: Controls the water supply to the entire building.
Supply Line: Carries fresh water to fixtures.
Drain Line: Carries wastewater away from fixtures.
Effluent: Wastewater.
Potable Water: Water safe for drinking.
Gallons Per Minute (GPM): A measure of water flow.
PSI (Pounds Per Square Inch): A measure of water pressure.
Rough-in: The installation of pipes and fittings within walls and floors before the final fixtures are installed.
Finish-out: The installation of visible fixtures (faucets, toilets, sinks) after walls are closed.
Module 2: Water Supply Systems - The Lifeline
2.1 Understanding Water Sources & Distribution
Learn where water comes from and how it gets to a building.
Municipal Water Supply: Water treated and delivered by a public utility.
Well Water Systems: Private systems involving a well, pump, and pressure tank.
Main Water Line: The primary pipe bringing water into the building.
Water Meter: Measures water consumption from a municipal supply.
2.2 Common Pipe Materials & Their Applications
Each material has specific uses and installation methods.
Copper: Durable, corrosion-resistant, good for hot and cold potable water. Joined by soldering or compression fittings.
YouTube Video: "Soldering Copper Pipes for Beginners"
PEX (Cross-linked Polyethylene): Flexible, easy to install (fewer fittings), resistant to freezing, cost-effective. Joined by crimp or expansion fittings.
YouTube Video: "Installing PEX Piping with Crimp Fittings"
PVC (Polyvinyl Chloride): Primarily for cold water supply, drain lines, and vent lines. Not suitable for hot water or pressurized potable water in many areas. Joined by solvent cement.
YouTube Video: "How to Solvent Weld PVC Pipes"
CPVC (Chlorinated Polyvinyl Chloride): Similar to PVC but designed for hot and cold potable water. Joined by solvent cement.
Galvanized Steel: Older material, prone to corrosion and mineral buildup, leading to reduced water pressure. Often replaced during renovations. Joined by threaded fittings.
2.3 Valves & Their Functions
Crucial for controlling water flow and isolating systems.
Gate Valve: For full open/closed operation, not for throttling flow. Best for main shut-off valves.
Ball Valve: Quarter-turn operation, highly durable, excellent for full open/closed. Very common today.
Stopcock/Service Valve: Smaller valves typically found at individual fixtures (e.g., under sinks, behind toilets) to shut off water to that specific fixture.
Pressure Reducing Valve (PRV): Reduces high incoming water pressure to a safe level for household plumbing.
Check Valve: Allows water to flow in only one direction, preventing backflow.
2.4 Basic Hot Water Systems
Understanding how water is heated for household use.
Conventional Tank Water Heaters: Store and heat water in a large tank.
Components: Burner/Heating Element, Tank, Thermostat, Dip Tube, Anode Rod, Relief Valve (T&P Valve).
Maintenance: Draining the tank, checking the anode rod, testing the T&P valve.
Tankless Water Heaters (On-Demand): Heat water as it flows through, only when needed. More energy-efficient.
YouTube Video: "Basic Water Heater Maintenance"
Module 3: Drainage, Waste, and Vent (DWV) Systems - The Exit Route
3.1 The Purpose of the DWV System
A critical, often unseen, part of plumbing.
Drainage: Carries wastewater away from fixtures.
Waste: The wastewater itself.
Ventilation: Allows atmospheric pressure into the drainage system, preventing siphoning of traps and allowing wastewater to flow smoothly. Also vents sewer gases safely outside.
3.2 Understanding Traps
The unsung hero preventing foul odors.
P-Trap: The most common trap, shaped like a "P," found under sinks. It holds a small amount of water to create a seal against sewer gases.
S-Trap: Older, less common, and often problematic as it can siphon dry more easily. Modern codes generally discourage S-traps.
Trap Arm: The horizontal pipe connecting the trap to the drain/vent system.
Cleanout: An access point in the drain line to remove clogs.
3.3 Venting Systems - The Breath of the Drains
Proper venting is crucial for a functional drainage system.
Main Vent: The primary vent stack running through the roof.
Branch Vents: Connect individual fixture traps to the main vent.
Stack Vent: The upper portion of a soil or waste stack above the highest fixture, extending through the roof.
Relief Vent: Connects a horizontal drain line to a vent stack.
Circuit Vent: Vents a group of fixtures.
YouTube Video: "Understanding Plumbing Vents and Why They're Important"
3.4 Common Drain Materials
Similar to supply lines, different materials for different jobs.
PVC/ABS: Most common for modern DWV systems due to ease of installation, cost, and corrosion resistance.
Cast Iron: Older, very durable, quiet, but heavy and difficult to work with.
Drainage Fittings: Designed with specific angles to allow smooth wastewater flow and prevent clogs (e.g., long sweep elbows, Wye fittings).
Module 4: Essential Plumbing Tasks & Troubleshooting (Practical Skills)
4.1 Clearing Clogs
The most frequent call for a plumber.
Using a Plunger:
For sinks: Block the overflow, create a good seal, plunge firmly.
For toilets: Use a flange plunger, ensuring a good seal over the drain hole.
YouTube Video: "How to Properly Use a Plunger"
Using a Hand Auger/Drain Snake:
For sinks/tubs: Remove the stopper, feed the snake until resistance is met, crank to break up/retrieve clog.
For toilets (closet auger): Designed to clear toilet clogs without damaging porcelain.
YouTube Video: "Clearing Drains with a Hand Auger"
Chemical Drain Cleaners: Use with extreme caution, as they can be corrosive and harmful. Often a temporary fix and can damage pipes. Generally discouraged for professional use.
4.2 Fixing Leaky Faucets
A common household repair.
Identify the Type: Compression, cartridge, disc, or ball faucet. Each has a different repair method.
Tools: Screwdrivers, Allen wrenches, channel locks, replacement O-rings, washers, cartridges.
Steps: Shut off water, disassemble faucet, replace worn parts, reassemble.
YouTube Video: "Repairing a Leaky Cartridge Faucet"
4.3 Toilet Repairs
Often simpler than they appear.
Running Toilet: Usually caused by a faulty flapper, fill valve, or float.
Clogged Toilet: (See clearing clogs above).
Loose Toilet: Tightening bolts at the base.
Leaking Toilet Base: May require replacing the wax ring.
YouTube Video: "Troubleshooting & Fixing a Running Toilet"
4.4 Basic Pipe Repair & Replacement
From pinhole leaks to section replacement.
Temporary Fixes: Pipe clamps, epoxy putties for minor leaks.
Permanent Repairs:
Cutting & Joining: Measuring, cutting, deburring, and joining pipes using appropriate fittings and methods (soldering for copper, solvent weld for PVC/CPVC, crimping for PEX).
Replacing a Section: Isolating the water supply, cutting out the damaged section, and installing a new piece with couplings.
YouTube Video: "Emergency Pipe Repair Solutions"
4.5 Water Heater Troubleshooting
Basic diagnosis for common issues.
No Hot Water: Check pilot light (gas), circuit breaker/reset button (electric), thermostat settings.
Not Enough Hot Water: Sediment buildup, faulty heating element/burner, undersized tank.
Leaking Water Heater: Can be serious. Identify source (T&P valve, tank itself, connections).
YouTube Video: "Common Water Heater Problems and Solutions"
Module 5: Professionalism, Business & Next Steps
5.1 Customer Service Excellence
A skilled plumber is also a trusted professional.
Communication: Clearly explain issues and solutions.
Punctuality: Arrive on time or communicate delays.
Tidiness: Leave the work area cleaner than you found it.
Respect: Treat homes and property with care.
Integrity: Be honest about needed repairs.
5.2 Understanding Building Codes
Plumbing is heavily regulated.
Local Codes: Familiarize yourself with local municipal and regional plumbing codes. These ensure safety, health, and proper installation.
Permits & Inspections: Understand when permits are required for plumbing work and how to arrange inspections.
5.3 Continuing Education & Specialization
Plumbing is an evolving field.
Advanced Training: Water treatment, backflow prevention, hydronic heating, commercial plumbing.
Certifications: Obtain specialized certifications to enhance your skills and marketability.
Apprenticeships: While online learning provides a strong foundation, hands-on experience through an apprenticeship is invaluable for becoming a fully licensed plumber.
5.4 Launching Your Career
From student to professional.
Networking: Connect with other plumbers and contractors.
Seeking Employment: Look for entry-level positions or apprenticeships with plumbing companies.
Starting Your Own Business: Once experienced and licensed, consider starting your own plumbing service.
Your Journey Starts Now!
This manual, combined with the practical demonstrations in our YouTube video library, will equip you with the knowledge and confidence to begin your plumbing career. Embrace the learning, practice diligently, and soon you'll be a vital part of keeping communities healthy and functional.
Goa Community Services -View Me- Empowering Your Future, One Skill at a Time.


A Lesson About Some of the Basic Hand Tools Used in Plumbing - Intro to Plumbing Systems
This video introduces the essential hand tools needed by a beginner plumber for cutting, joining, gripping, and measuring pipes across both the drain and supply systems.
Tools for Cutting and Preparing Pipe
Hacksaw: A common tool with fine, thin, and flexible teeth designed primarily to cut metal, but also used for copper and plastic. It is less ideal for beginners as it's difficult to get the perfectly square cut required for proper connections.
PVC Saw: Specifically made for cutting plastic pipe (ABS or PVC). It has a deeper blade, which helps brace the saw and makes it easier to achieve a true, squared end on the pipe, which is critical for strong connections.
Ratcheting Pipe Cutter: Works like shears or scissors, ratcheting closed to shear through plastic pipe easily, providing a nice, clean cut.
Tubing Cutter (Copper): Used for cutting metal pipes, particularly copper. It has a hardened wheel that is tightened against the pipe, cutting through it after several turns.
Reamer/Deburring Tool: This tool is often built into the tubing cutter. After a pipe is cut, the sharp inside and outside edges (burrs) must be removed. The reamer takes off the sharp edge to prepare the pipe for joining or sweating (soldering).
Chamfer Tool: A double-ended tool used to ream (clean the inside) and chamfer (smooth the outside) of plastic pipes, creating a finished end with no sharp edges.
Tools for Joining Copper (Sweating)
Pipe Brush: Used to polish the outside of the copper pipe and the inside of the fitting just before joining. Copper oxidizes when exposed to air, and this polishing process is necessary to make the surface super clean so the solder and flux can adhere properly.
Crimping Tool: Used on PEX pipe to compress a ring onto the pipe, clamping it to the fitting to create a watertight seal.
Propane Torch: Essential for heating copper pipes and fittings during the sweating (soldering) process. Propane burns at a lower temperature, which is good for beginners, while MAPP gas burns hotter for larger/heavier pipe.
Tools for Gripping and Measuring
Pipe Wrench: Used to grip round objects (like metal pipe) with a lot of force. The harder you pull or push on the handle, the harder the wrench grips. It is directional: the direction you apply force depends on whether you are tightening or loosening a connection.
Channel Lock Pliers: Adjustable pliers with grooved teeth for gripping pipe or fittings. When gripping a hex fitting (six sides), it is critical to set the jaws parallel to the fitting's sides to achieve full contact and avoid rounding off the edges.
Adjustable Wrench: Has two jaws that are always parallel, making it better suited than channel locks for tightening hex fittings without stripping the edges. The best practice is to set the jaws slightly too big, then tighten them down until they fit snugly on the fitting.
Tape Measure: Critical for making accurate cuts and measuring pipe lengths.
Level (Torpedo Level): Used to verify the pitch of the drains. Drains must be set at a slope of about a quarter inch per foot (a two percent pitch) to ensure wastewater flows downhill properly.

How Your Home Plumbing Works (From Start to Finish) | GOT2LEARN
This video provides a big-picture overview of the four main components of a home's plumbing system, detailing how water gets in, how waste gets out, and the importance of proper venting.
The home plumbing system is composed of four main elements: Waste Drains, Waste Vents, Potable Water, and Rainwater Management.
Potable Water (Supply) System
Source and Pressure: Potable (safe to drink) water typically comes from the street, supplied by the city with pressures usually between 40 to 80 PSI (Pounds Per Square Inch).
Shut-Off Valves: Every home must have a main shut-off valve outside (accessible by the city) and usually another valve inside (accessible to the homeowner).
Materials: Common pipe materials used for supply lines include Copper, CPVC, and PEX (Cross-linked Polyethylene). PEX is increasingly used in new construction for its reliability and quick installation.
Hot Water: The hot water tank (either electric or gas-fed) is supplied with cold water and uses the city's pressure to distribute the heated water throughout the house.
Rural Supply (Wells): For homes without municipal services, a well is drilled to access groundwater which is pumped up and sent through apparatuses to make it drinkable.
Waste Drains and Vent (DWV) System
Drain Pipes: These pipes (made of ABS, PVC, or cast iron) are connected to all fixtures (toilets, sinks, showers). The pipes have a slight slope to allow gravity to carry the waste down the main drain to the municipal sewer.
Pipe Sizes: Toilets are typically 3 inches, and main stacks are 3 or 4 inches. Sinks are generally 1.5 or 2 inches.
Clean-Outs: These are access points in the drain line to allow a plumber to reach and clear a blockage.
Septic Systems (Non-Municipal): If municipal services are unavailable, the main drain goes into a septic tank, which separates solids from liquids. The liquid flows into a leach field or drain field to be naturally filtered into the ground. The solids must be pumped out periodically.
Venting System (The V in DWV): Vents are crucial for maintaining the system's function.
Purpose: Vents equalize the pressure change that occurs when water drains (like when a toilet is flushed). This prevents gurgling and, most importantly, prevents the water from being siphoned out of the P-traps.
Safety: The P-trap water seal is vital because it prevents sewer gases from finding their way into the home.
Structure: Vents get their air through the roof and must be kept clear of debris.
Rainwater Management
Diversion: Rainwater is collected from the roof into gutters and then through downspouts. The main goal is to divert the water away from the house's foundation to prevent water infiltration and damage.
Municipal Path: Rainwater eventually flows into the municipal storm drain and is usually dumped into a nearby river, separate from the sanitary sewer system.

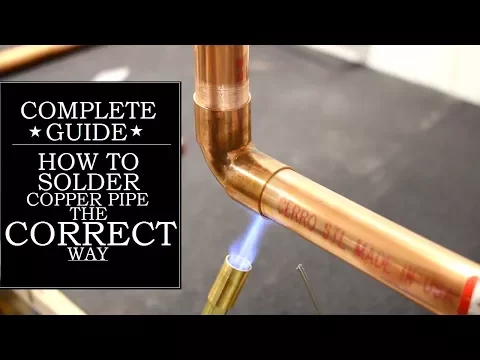
How to Solder Copper Pipe The CORRECT Way | GOT2LEARN
This video focuses on the fundamental, three-step process for soldering copper pipe to ensure a permanent, leak-free joint, which is a key skill for installing water supply lines.
Step 1: Preparation (The Secret to a Leak-Free Joint)
Preparation is the most critical step and should never be skipped.
Clean the Pipe: Use sandpaper or Emery cloth to clean the outside surface of the pipe where it will penetrate the fitting, removing all surface corrosion or dirt. The area should be polished until it resembles clean copper.
Clean the Fitting: Use a water brush (or a dedicated brush size) to clean the inside of the fitting to rough up the surface slightly. This ensures the solder adheres better.
Apply Flux: Apply soldering flux or paste to both cleaned surfaces (pipe and fitting) that will touch.
Purpose of Flux: The primary purpose of flux is to prevent the copper from oxidizing during the heating process. Without it, soldering is impossible.
Step 2: The Soldering Process
The goal is to heat the joint until it's hot enough for the solder to be pulled into the connection.
Choose Your Fuel: You can use ordinary propane gas or MAPP gas. MAPP gas burns hotter and heats the joint quicker.
Apply Heat Correctly: It is imperative to start heating the joint at the bottom first.
Reasoning: As you heat the bottom, the heat rises and heats the entire joint, and it prevents the solder from being pulled down by gravity before the entire joint is ready to melt and accept the filler material.
Use Capillary Action: Continue heating the joint and occasionally test it with your solder. Once the joint reaches the correct temperature, capillary action will occur. This is the scientific principle that allows the liquid solder to flow into the narrow space between the pipe and the fitting, even moving upwards against gravity.
Run the Bead: Once the joint is hot enough to suck in the solder, run a nice bead of solder all around the joint to ensure full coverage.
Step 3: Finalizing the Joint
Wait for Cooling: After soldering, allow the joint to cool down naturally for a couple of minutes until the solder has solidified.
Clean Excess Flux: Once the solder is solid, use a rag to wipe off any excess flux that remains on the pipe. If left on, this flux can eat away at the pipe over the long run.