Your Growth Is Our Mission — Let’s Build a Better Future Together

🔧 How to Fix a Faulty LED Torchlight Like a Pro
What Is Inside a Torchlight? – Understanding the Key Components
Before you can repair a torchlight, you must understand how it works. A torchlight may look simple from the outside, but inside it holds a smart combination of electronic components that each serve a specific purpose. Whether it’s an LED flashlight, a rechargeable torch, or a battery-powered lamp, the fundamental design is nearly the same.
🛠️ Key Components of a Torchlight:

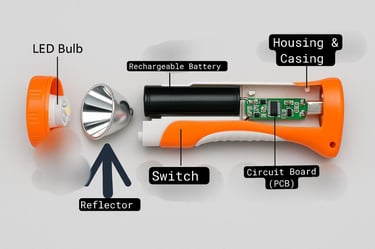
LED Bulb (Light Emitting Diode):
The source of light, known for its efficiency and long life. It requires very little voltage and produces bright illumination.Reflector & Lens:
Helps to focus the light beam forward. Some torches have built-in focus adjustment features.Rechargeable Battery (Lithium-Ion or NiMH):
Stores energy for use. Often the first part to degrade if mishandled or overcharged.Circuit Board:
The brain of the torch. Controls power distribution, LED function, and charging safety.Switch Mechanism:
Turns the torch on/off. Often connected to the board with small wires and prone to wear.Charging Port & Protection Circuit:
Allows the torch to be recharged. Includes safety circuits to prevent overcharging or overheating.Casing & Housing:
The external body, usually made from ABS plastic or aluminum, protects the internal parts.
What Commonly Goes Wrong?
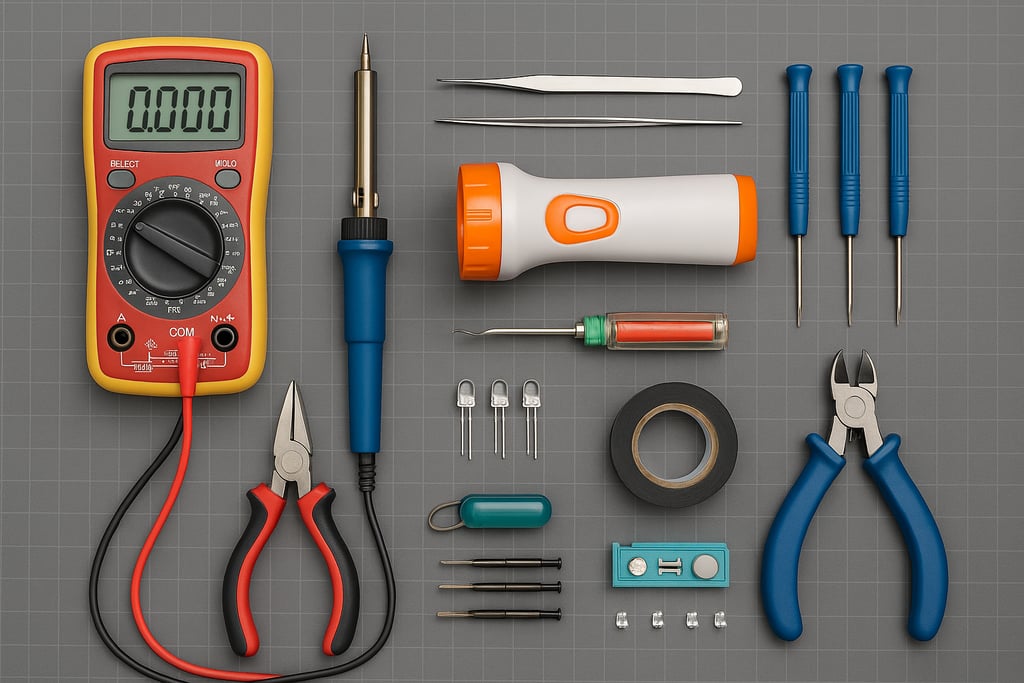
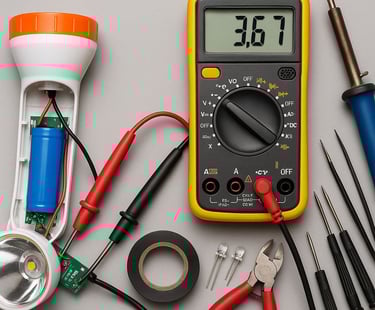
🔧 Essential Tools:
Mini Screwdriver Set – For opening the casing without damage.
Digital Multimeter – To test battery voltage, continuity, and circuit health.
Soldering Iron & Lead – To reconnect wires or replace damaged components.
Precision Tweezers – For holding small wires or LED terminals.
Wire Stripper/Cutter – To cleanly strip wires or cut away burnt sections.
Insulating Tape / Heat Shrink Tubes – For safe re-covering of exposed wires.
Spare LEDs / Batteries / Switches – In case components need replacement.
🧰 Pro Tip: Always keep a magnifying glass or headlamp if you're working in low light or dealing with very small circuit details.
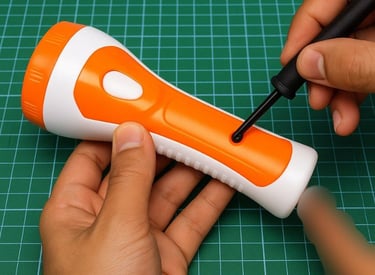
Step-by-Step Torchlight Diagnosis
Now that you have your tools ready, let’s begin diagnosing the faulty torchlight. The process involves visual checks, testing, and component isolation.
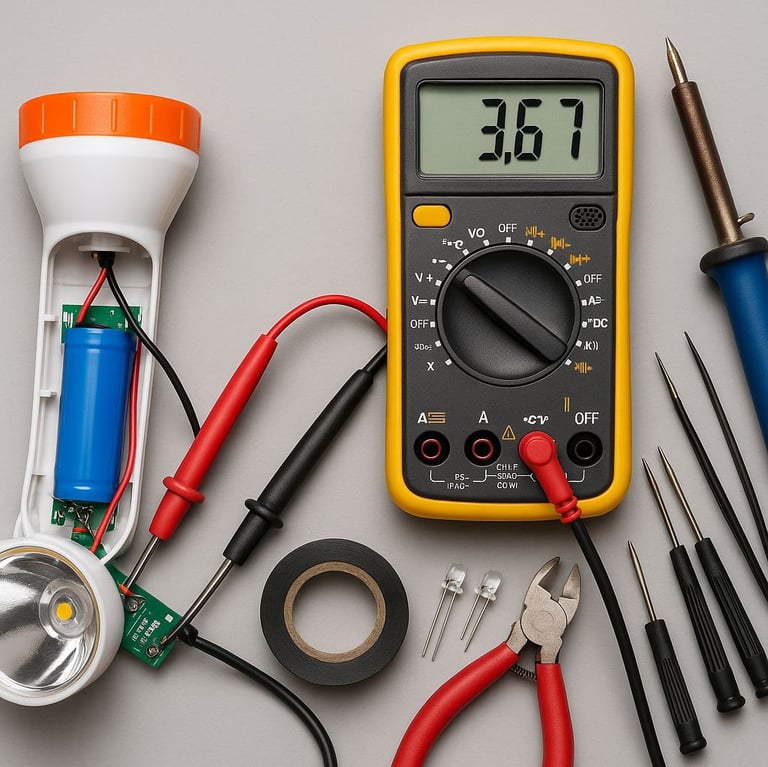
Replacing Faulty Components (Step-by-Step Repair)
Now that you’ve identified the faulty part, it’s time to fix it. Whether it's a loose wire, burnt LED, or swollen battery — this section gives you precise steps to carry out each replacement confidently.
🔄 Fixing Common Faults:
🔋 1. Replacing a Swollen or Dead Battery:
Unsolder or unplug the battery from its connection point.
Replace with the same voltage and size (usually 3.7V lithium-ion).
Ensure polarity is correct: Red = Positive, Black = Negative.
Secure it with adhesive foam or plastic clips inside the casing.
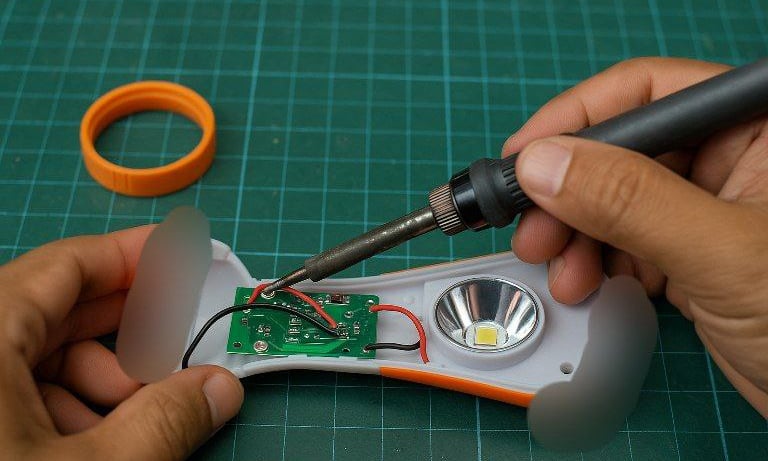
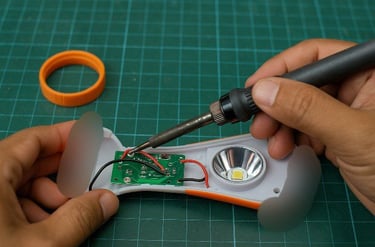
💡 2. Fixing/Replacing a Burnt LED:
Desolder the LED gently using your iron.
Clean the contact pad, apply a new LED of matching specs.
Re-solder the legs, ensuring they don’t bridge.
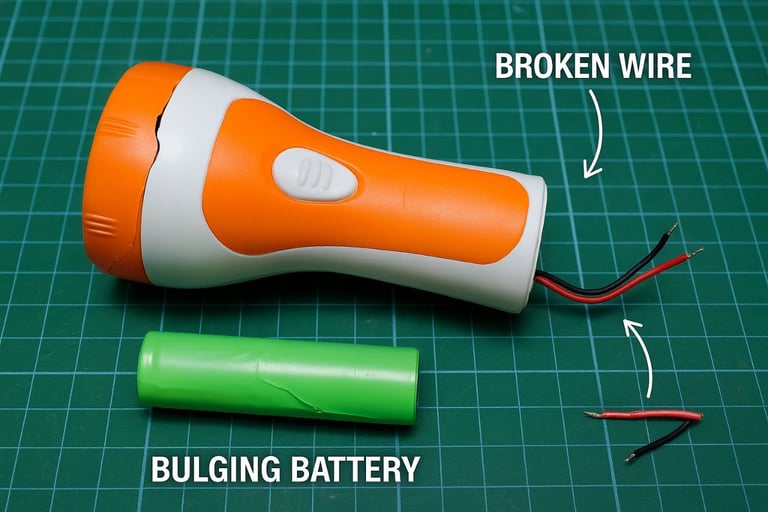
🧷 3. Repairing a Broken Wire or Switch:
Locate the broken or detached wire.
Strip a small portion of both ends using a wire stripper.
Solder back to its correct point or reroute using jumper wires.
Replace damaged switches with new push-type buttons or sliders.
🛑 Safety Tip: Always test the new components with your multimeter before closing the torchlight. If you smell burning or see flickers, immediately disconnect.
Reassembling the Torchlight
Once repaired, careful reassembly ensures durability and safety.
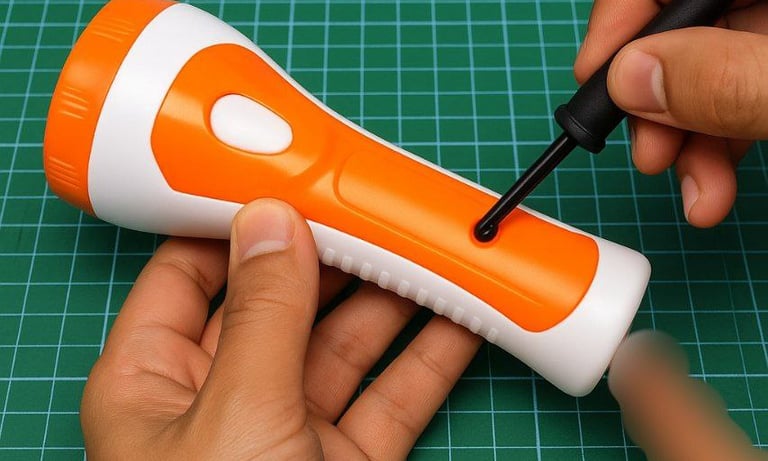
✅ Final Steps:
Tidy Up Wires – Use electrical tape to bundle loose wires and prevent short-circuits.
Secure Battery & Board – Use plastic fasteners or original clips.
Close Casing Firmly – Make sure all clips snap and screws are tightened.
Charge & Test – Plug it into its charger. Observe LED charging indicator.
Function Test – Turn it on and test brightness, switch response, and charging behavior.
🧠 Recap:
You’ve now disassembled, diagnosed, repaired, and reassembled a faulty torchlight.
With these steps, even a beginner can safely restore most common torchlight issues.
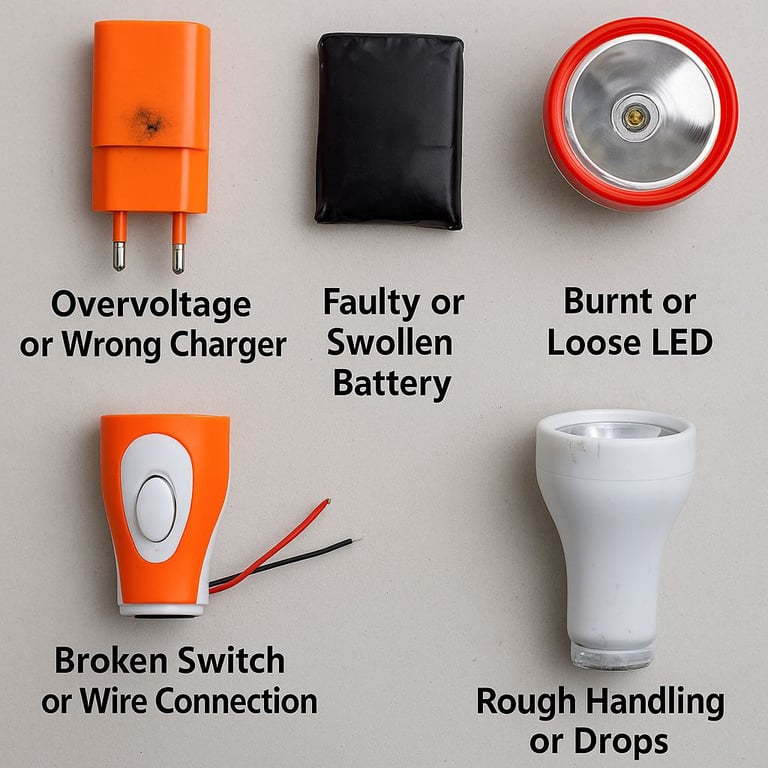
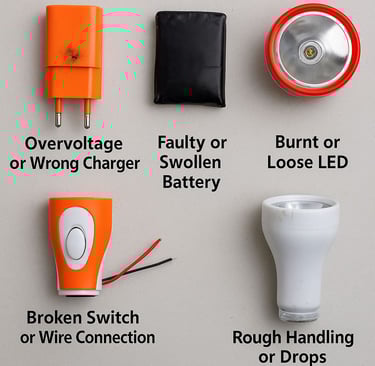
Despite the durable design, torchlights are vulnerable to various faults, especially with poor usage or low-quality charging devices. Let’s take a quick look at what could go wrong:
⚠️ Overvoltage or Wrong Charger: Damages the internal circuit and battery, especially if a high-current phone charger is used.
🔋 Faulty or Swollen Battery: Reduces runtime or prevents the torch from charging entirely.
💡 Burnt or Loose LED: Causes flickering or total failure of light.
🧷 Broken Switch or Wire Connection: Results in intermittent or no power delivery.
🚨 Rough Handling or Drops: Leads to physical damage or internal short circuits.
📝 Pro Tip: Always charge your torch with the original or a voltage-matched adapter. Overcharging is the most common killer of LED torches!
The Tools You Need — Electrician's Essential Kit
Before attempting any repair, you need the right tools to ensure safety, precision, and efficiency. Many torchlight faults can be fixed with these affordable and professional tools available in hardware or electronics stores.